Free design data: DIY large-format 3D printer
By Aranca Ehret (Edited by Shizu Yamaguchi)
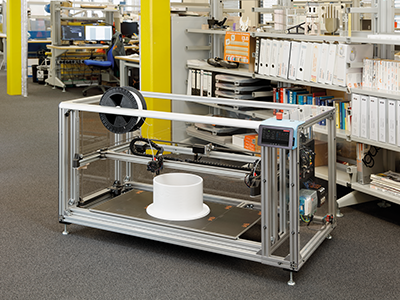
Can you 3D print components as large as one metre on your own? Even today, this would be a big achievement for a DIY designer. Desktop printers with component sizes of up to 300mm are already fairly commonplace. There is also a wide variety of devices and manufacturers. Depending on the manufacturer and whether you buy a construction kit or a pre-assembled printer, acquisition costs usually range between $500 and $10,000. However, the choice of affordable 3D printers with a maximum part length of 1,000mm and more is still very limited. Here, the costs usually range upwards of $40K.
igus® systems have proven themselves many times over that it is well-suited for the construction of large-format 3D printers. For example, drylin® multi-axis linear robots were used in a large-format 3D printer for house facades.
Inspired by their application success, the 3D printing team at igus built their own large-format printer for the 3D printing service.
What were the biggest challenges in building and commissioning the large-format 3D printer?
First, the larger size meant that deflection and vibrations of the printer could very much limit its function. So when designing such a printer, it was important to choose rigid materials for the build. In addition, because of the heated print bed, it was important to compensate for the thermal expansion (e.g. with an aluminium print bed of 1 metre length, a thermal expansion of more than 1mm could be reached at a temperature difference of 50°C). This problem was solved by float-mounting the print bed, allowing it to expand without deforming the printer. Furthermore, the print bed was scanned before printing to compensate for unevenness via the software.
During the actual 3D printing of the components, dimensional change due to temperature differences (shrinkage) of plastic components was also a big challenge. If shrinkage was too great, either the component would not be dimensionally accurate or the component would detach from the print bed. Similar to how this would be handled in FDM printing machines, the following measures were taken to counteract this:
Firstly, materials with low shrinkage ratings were used. In the following figures, the shrinkage was calculated for a plastic part with a length of one metre made of three different common materials:
ABS: 5mm
PETG: 3mm
PLA: 1mm
Secondly, shrinkage was minimized by decreasing temperature differences between the component and its surroundings, which allowed printed components to cool down together with its surroundings and the printer itself after the part had finished printing. Maintaining a consistent temperature between the plastic part and its surroundings was applied via passive heating. This kind of heating was achieved via an enclosure, which prevented heat from escaping, and the heat coming from the heated print bed. No active heating was used within the printer, as this would have added additional challenges because of the printer’s size.
Which components were installed?
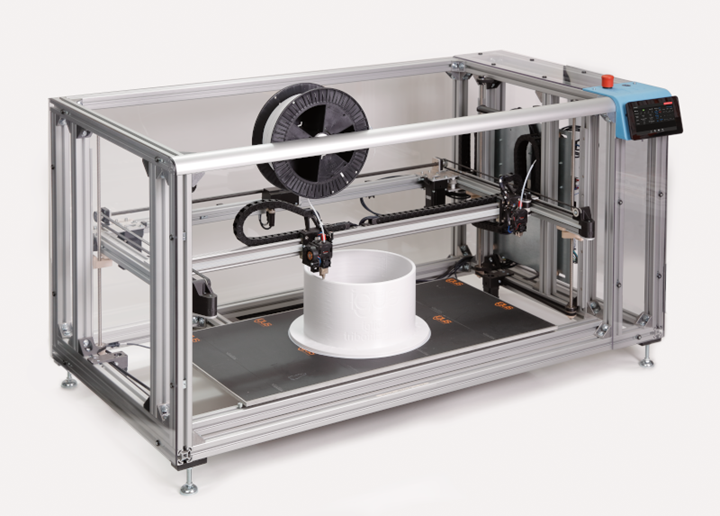
The following igus components were used in the construction of the large-format 3D printer:
- X-Y axes: Independent Dual Extruder (IDEX) with drylin® W and N profiles
- drylin R hollow profile shaft for transmitting drive torques to the belt drives
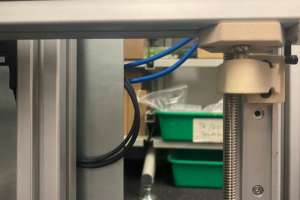
- drylin N and trapezoidal lead screw drives for the Z axis
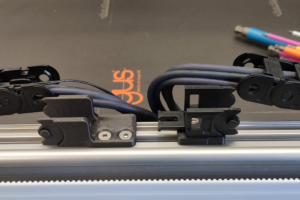
- E2i.15 energy chains to connect the X-Y linear robot
- drylin E NEMA 17 motors for the Z axis
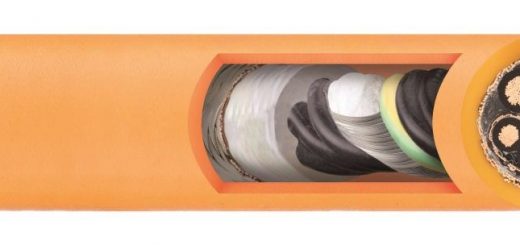
- drylin E NEMA 23 motors for X and Y axes – chainflex® CF9, CF298 and CF299 cables for all electronic connections
- xirodur® B180 xiros® deep groove ball bearing in the filament spool holder for improved unrolling of filament spool
Our in-house 3D printing service was used to produce structural components, holders, belt clamps and special mounting brackets for the installed energy chains on the large 3D printer. The new igus filament igumid P190 was applied as well. This filament is carbon fibre reinforced with a high flexural strength of up to 237MPa and a large modulus of elasticity of 11,500MPa. In addition, special drive nuts were made of iglide® i3 through laser sintering.
Note that individual 3D printed components can be requested and ordered very easily in our 3D printing service. All that is required is to upload the STEP model. From there, you can easily select the best material, the right quantity and order directly or request a quote.

Download the design data free of charge
You can download the design data free of charge here.
Note that the printer is specifically designed as a DIY 3D printer. Also, igus is not a manufacturer of 3D printers and will therefore not be able to offer support in setting up the 3D printer.
Key data about the DIY large-format printer:
- Installation space dimensions: approx. 1000 x 500 x 500mm
- Outer dimensions: approx. 1612 x 816 x 800mm
- Weight: approx. 40-60kg
- Control system: Duet3D system with touchscreen interface
- Print head: two independent print heads, Direct Drive, model and nozzle diameter freely selectable
- Printing table: 10mm cast aluminium plate
- Setup time: approx. 3-5 days (when all components are ready, not including time for additional research)
What did we learn from the setup?
Keep It Simple – Even though there are lots of options, the simpler way is often the more effective one.
Energy chains are an important part of a machine as soon as components or assemblies move in relation to each other – no matter to what extent – and should be included in the design at an early stage.
More information about 3D printer construction is available here:
Lightweight, cost-effective, and self-lubricating products for 3D printer construction kits